
最终效果图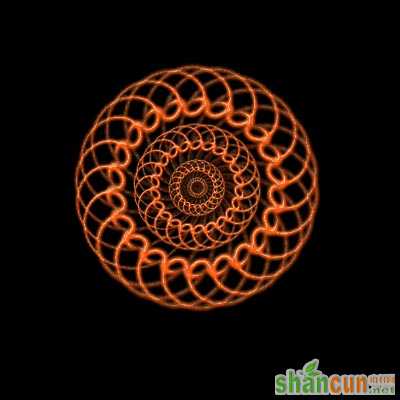 nmousewheel="return bbimg(this)" onload="javascript:resizepic(this)" border="0"/>
 nmousewheel="return bbimg(this)" onload="javascript:resizepic(this)" border="0"/>
 nmousewheel="return bbimg(this)" onload="javascript:resizepic(this)" border="0"/>
 nmousewheel="return bbimg(this)" onload="javascript:resizepic(this)" border="0"/>
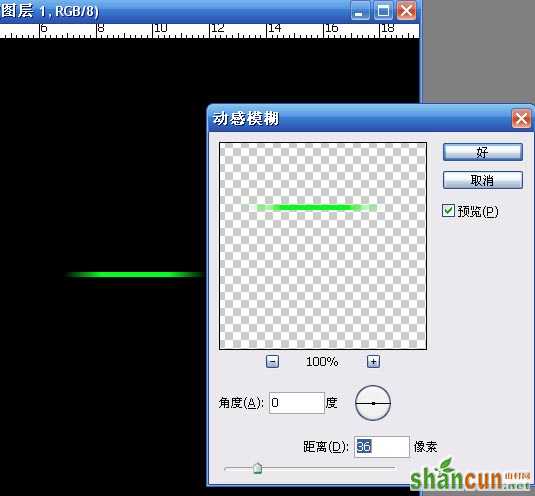
1、新建一500*500像素文档,填充黑色,新建一个图层,用框形选取框画一个细长形的长方形,然后使用滤镜——模糊——动感模糊。
 nmousewheel="return bbimg(this)" onload="javascript:resizepic(this)" border="0"/>
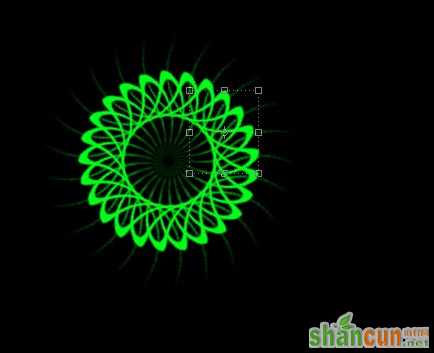
2、使用滤镜—扭曲—旋转扭曲,角度大家自己掌握,3lian.com,因为这个图形是随机的所以大家的效果可能跟偶的不一样。
 nmousewheel="return bbimg(this)" onload="javascript:resizepic(this)" border="0"/>
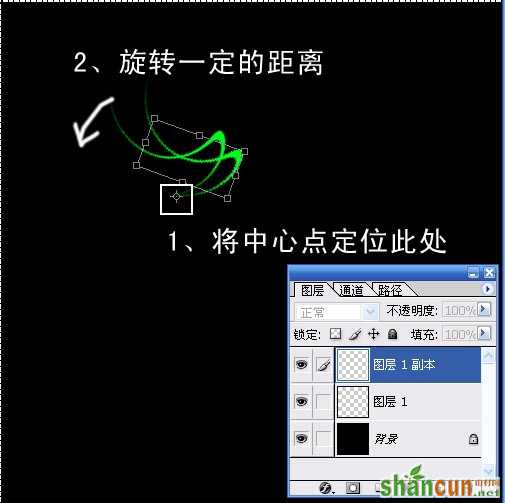
4、将图层1复制,对图层1副本进行操作(见图),这一步非常关键,第1步是定位(系统将图绕此点),第2步是决定图形的形状(这里我们将它旋转一定的角度)系统将进行如下处理:图形始终围绕一个点进行旋转复制。
 nmousewheel="return bbimg(this)" onload="javascript:resizepic(this)" border="0"/>
5、左手按住alt+ctrl+shift,右手连续按下T键,完成后效果如下图:
nmousewheel="return bbimg(this)" onload="javascript:resizepic(this)" border="0"/>
6、隐藏背景层按下ctrl+shift+E合并可见图层,简单的变幻线就完成了。
 nmousewheel="return bbimg(this)" onload="javascript:resizepic(this)" border="0"/>
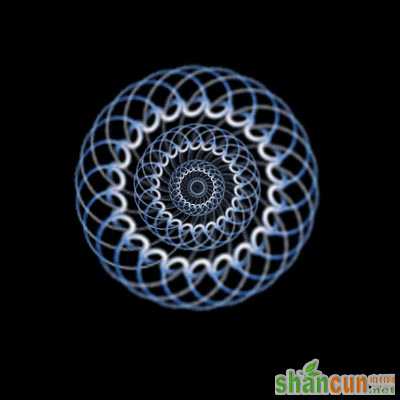
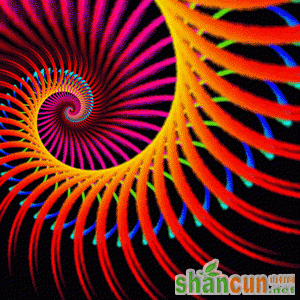
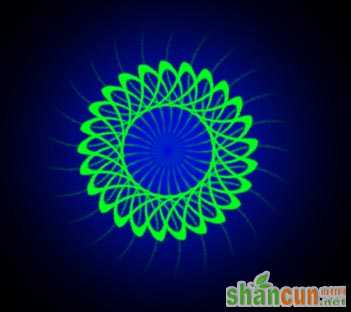
动脑筋想一想上面这些变幻线是怎么制作出来的
大家可以发挥自己的想象
制作出各具风格的变幻线。。。。。。
nmousewheel="return bbimg(this)" onload="javascript:resizepic(this)" border="0"/>
nmousewheel="return bbimg(this)" onload="javascript:resizepic(this)" border="0"/>
3lian素材nmousewheel="return bbimg(this)" onload="javascript:resizepic(this)" border="0"/>


