
photoshop作为图片处理工具的佼佼者,今天小编教大家photoshop置换滤镜的使用,教程真的很不错,很值得大家学习,来看看吧!
方法/步骤
如图所示,我们点击箭头所指的photoshop软件图标,打开photoshop软件。

如图所示,我们点击箭头所指的“文件”这一项。
如图所示,在弹出的列表菜单中,我们点击箭头所指的“打开(O)...”这一项。

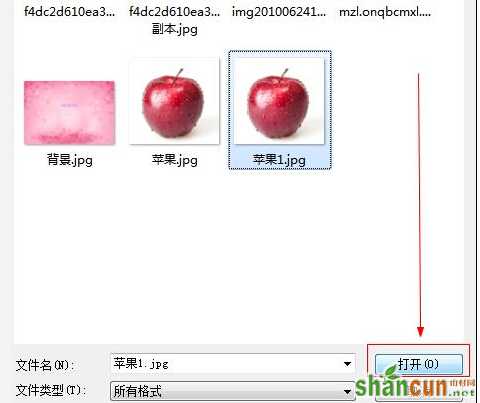
如图所示,我们选择一张图片,接下来我们点击箭头所指的“打开”按钮。
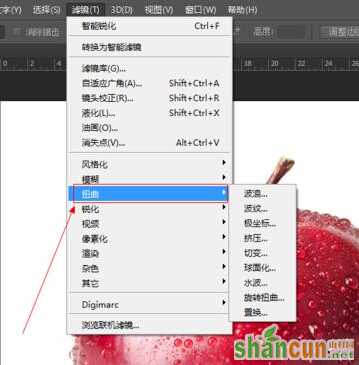
如图所示,点击“滤镜”这一菜单,在弹出的下拉列表菜单中,我们点击箭头所指的“扭曲”这一项。
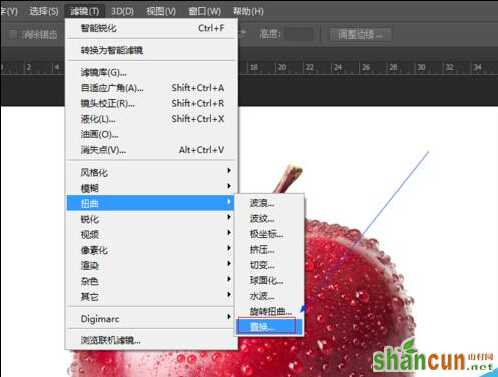
如图所示,在弹出的菜单中,我们点击箭头所指的“置换...”这一项。
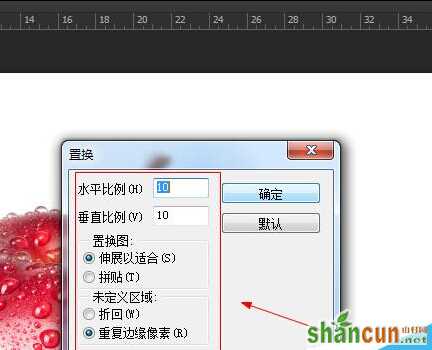
如图所示,在弹出的窗口中,我们调节箭头所指的水平比例和垂直比例的参数以及下面菜单的选择,之后我们点击“确定”按钮。
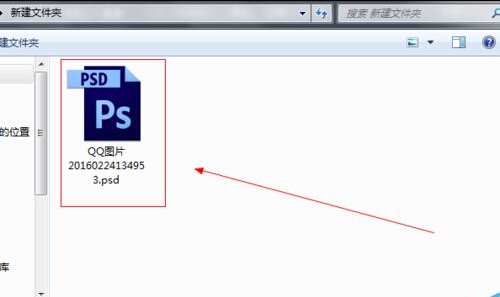
如图所示,在弹出的文件对话框中,我们选择PSD文件之后,我们点击“打开”按钮。
如图所示,我们看到使用置换滤镜之后,我们看到苹果出现了那个选择的PSD文件的相应变形。

以上就是photoshop置换滤镜的使用实例方法介绍,希望这篇文章能对大家有所帮助!


