
教程详细介绍玻璃等透明物体的抠图技巧,思路:首先要分解透明物体的构成部分,先把不透明部分的先抠出来,其他的部分抠出来来多复制几层,需要改变图层的混合模式,有些部分还需要使用画笔来涂抹。作者的方法用的比较新颖值得学习!
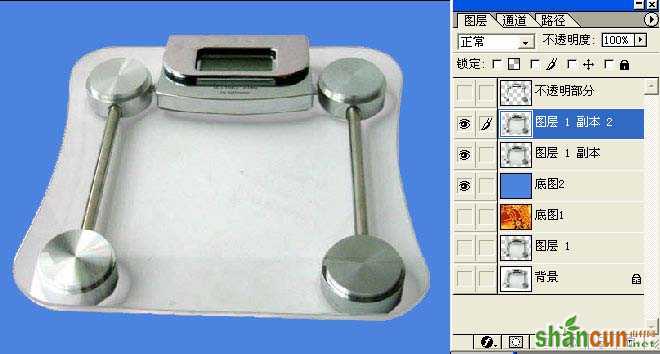
原图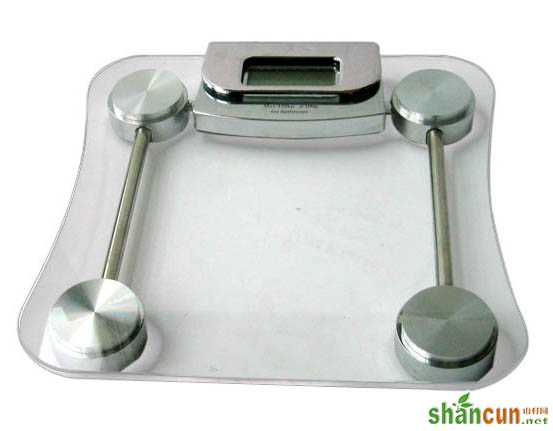 nmousewheel="return bbimg(this)" onload="javascript:resizepic(this)" border="0"/>
最终效果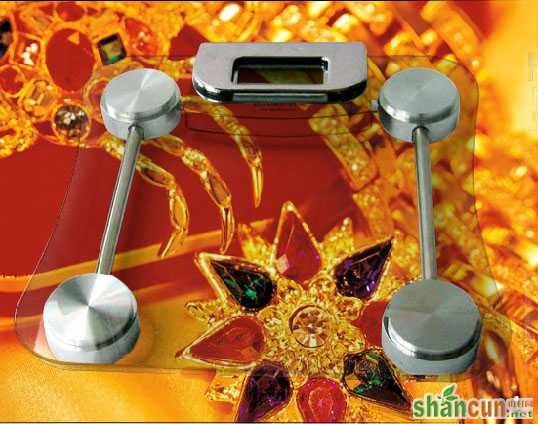 nmousewheel="return bbimg(this)" onload="javascript:resizepic(this)" border="0"/>
1、首先用工笔工具或套索工具勾出不透明的部分。注意:红框里的工具都是可用的,我一般都是喜欢用精确的钢笔工具。
 nmousewheel="return bbimg(this)" onload="javascript:resizepic(this)" border="0"/>
2、按ctrl+enter键,路径转为选区了。如图所示:(顺便说句:大家看到我图层里有两个图,我是留着做最后做底图用的,与抠图过程没关系,不要管它)。
 nmousewheel="return bbimg(this)" onload="javascript:resizepic(this)" border="0"/>
3、按ctrl+j后在背景层上方自动生成图层1,如图:
nmousewheel="return bbimg(this)" onload="javascript:resizepic(this)" border="0"/>
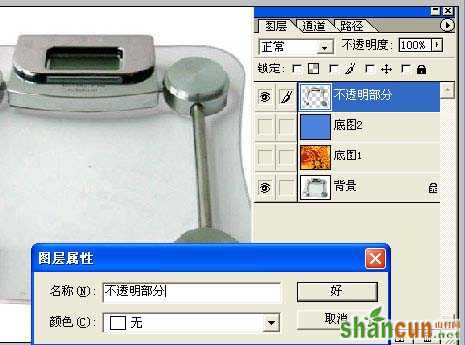
4、将图层1拖至最上方,点图层1按右键,将图层1改名为“不透明部分”(当然不改也行,我这里便于大家能一目了然好理解)
 nmousewheel="return bbimg(this)" onload="javascript:resizepic(this)" border="0"/>
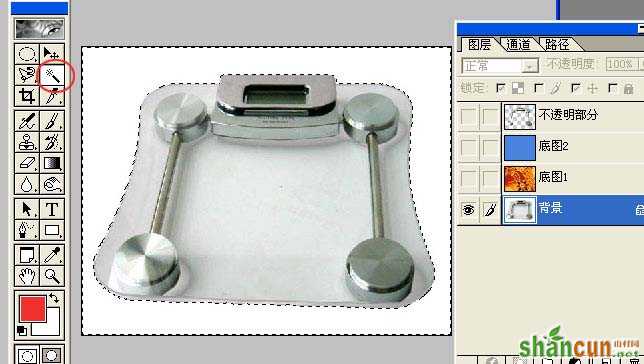
5、回到背景层,用魔棒工具选取白色区域。
 nmousewheel="return bbimg(this)" onload="javascript:resizepic(this)" border="0"/>
6、进行反选,这样一来就选取了玻璃了,大家看,蚂蚁线这次是围住了玻璃。如图:
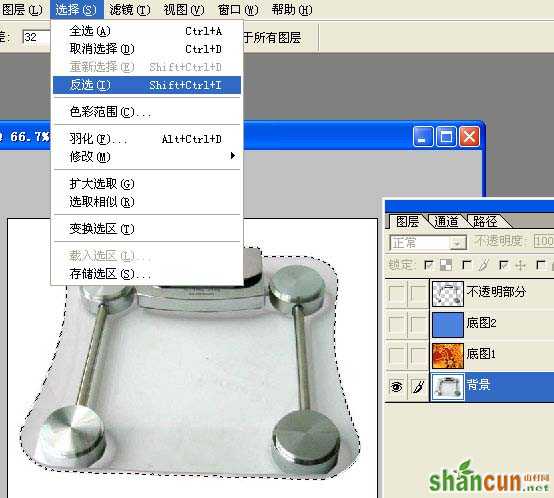 nmousewheel="return bbimg(this)" onload="javascript:resizepic(this)" border="0"/>
7、不要取消蚂蚁线,按ctrl+j,3lian.com,生成图层1,隐藏背景层,显示效果如图所示:
 nmousewheel="return bbimg(this)" onload="javascript:resizepic(this)" border="0"/>
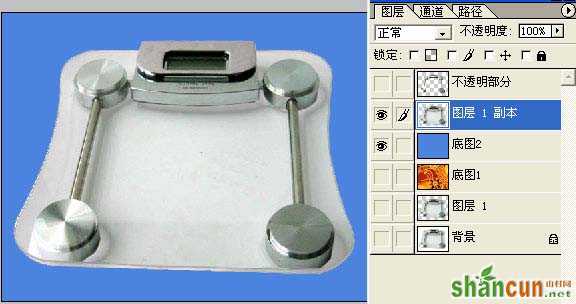
8、复制图层1为“图层1副本”,拖至“底图2”上方,打开底图2图层前的眼睛,让图层2为可见状态。具体如图所示:
 nmousewheel="return bbimg(this)" onload="javascript:resizepic(this)" border="0"/>
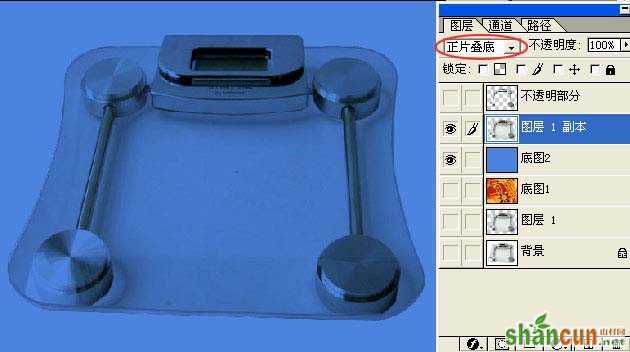
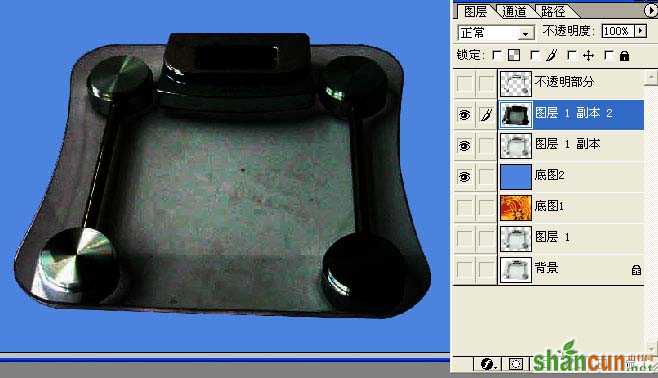
9、将“图层1副本”设定为“正片叠底”,注意看红色椭圆里的内容。大家看,设定正片叠底后,玻璃下的白色消失了,但是玻璃显得暗淡,没有光泽感,不自然。所以抠图还得继续。
 nmousewheel="return bbimg(this)" onload="javascript:resizepic(this)" border="0"/>
10、再次回到“图层1”,复制图层1为“图层1副本2”,3lian素材,并移到“不透明部分层”的下方(顺便说句:大家在操作时注意看我的图层的隐藏与显示,有眼睛的为显示,没眼睛的为隐藏)。
 nmousewheel="return bbimg(this)" onload="javascript:resizepic(this)" border="0"/>
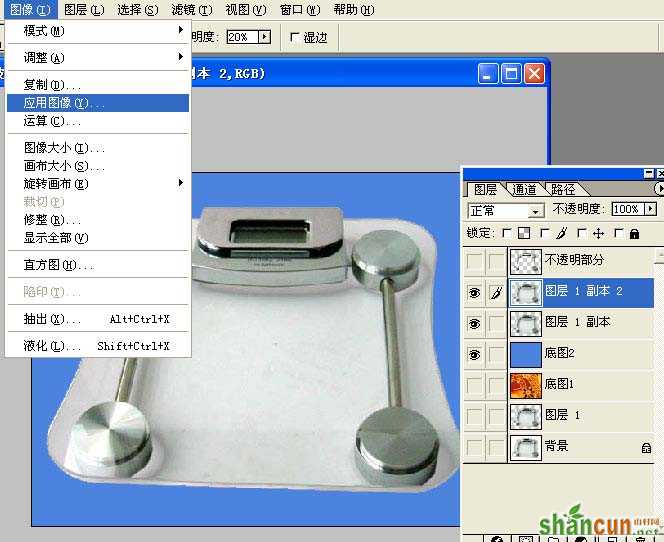
11、将“图层1副本2”应用图像命令,如图所示:
nmousewheel="return bbimg(this)" onload="javascript:resizepic(this)" border="0"/>
12、将混合模式设定为“正片叠底”。大家看,图像明显变暗了。为什么要让图像变暗呢?目的就是要使图像的黑白反差加强,让图像暗淡,只留最强的高光区域便于抠图。
 nmousewheel="return bbimg(this)" onload="javascript:resizepic(this)" border="0"/>
13、再重复使用刚才的应用图像命令二次,所得效果显示如图:
 nmousewheel="return bbimg(this)" onload="javascript:resizepic(this)" border="0"/>
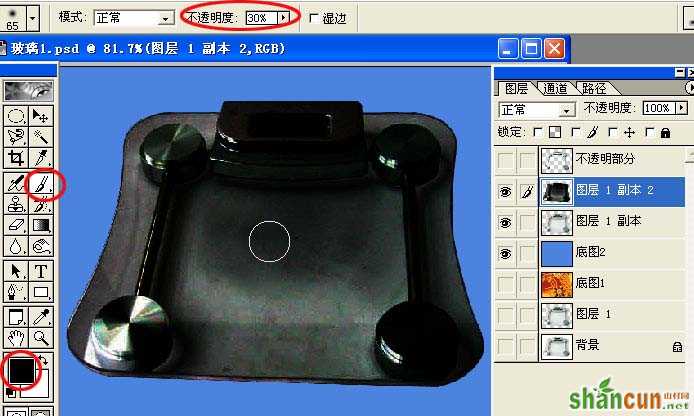
14、将前景色定为黑色,用画笔工具以30%的不透明度向玻璃上涂黑。
 nmousewheel="return bbimg(this)" onload="javascript:resizepic(this)" border="0"/>
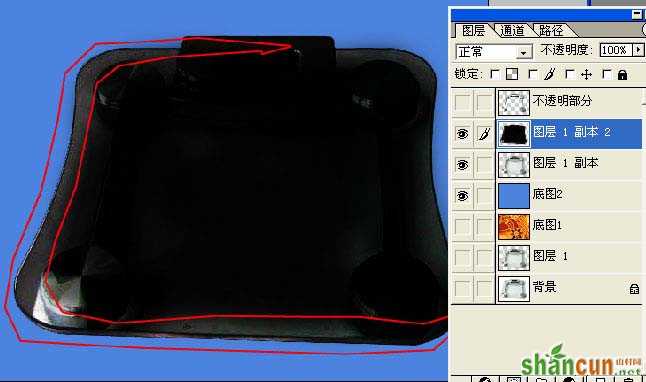
15、注意用红圈圈住的周边不要全涂黑了,因为那些最终才是玻璃光亮的部分。
 nmousewheel="return bbimg(this)" onload="javascript:resizepic(this)" border="0"/>
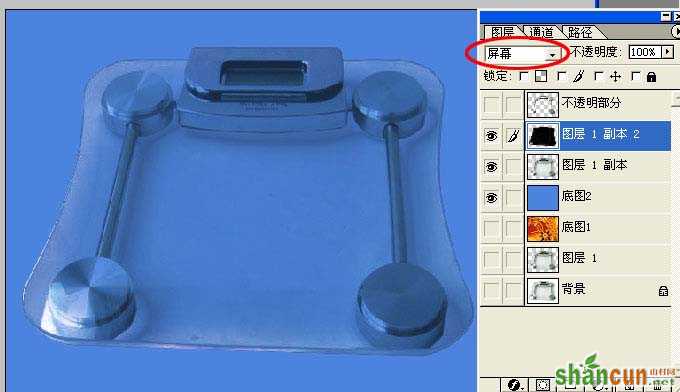
16、将图层1副本2设定为“屏幕”或“滤色”。3lian.com,注意红色椭圆里的内容。大家看,这次玻璃有光亮了,但原图的白色还隐隐存在,必须继续涂抹黑色从而减淡白底。
 nmousewheel="return bbimg(this)" onload="javascript:resizepic(this)" border="0"/>
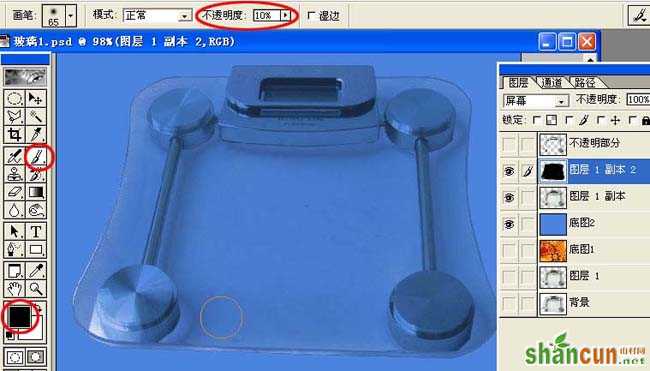
17、这次将画笔的不透明度设定为10%进行涂抹。
 nmousewheel="return bbimg(this)" onload="javascript:resizepic(this)" border="0"/>
18、让不透明部分层前的眼睛出现,为可见。大家看,玻璃抠出来了。
 nmousewheel="return bbimg(this)" onload="javascript:resizepic(this)" border="0"/>
19、换个背景看看效果。哇。。。玻璃显得更明净了。
 nmousewheel="return bbimg(this)" onload="javascript:resizepic(this)" border="0"/>
nmousewheel="return bbimg(this)" onload="javascript:resizepic(this)" border="0"/>


