
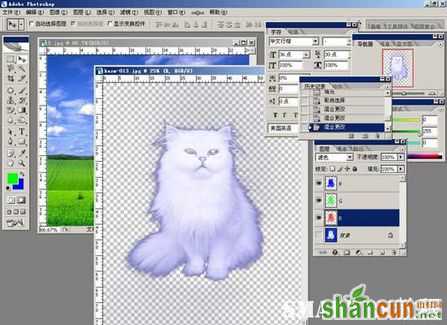
1、打开图片
 nmousewheel="return bbimg(this)" onload="javascript:resizepic(this)" border="0"/>
图19
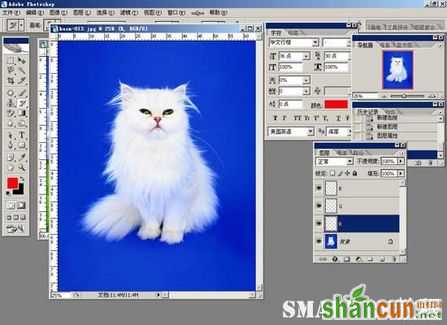
2、新建三层,分别命名R、G、B。
 nmousewheel="return bbimg(this)" onload="javascript:resizepic(this)" border="0"/>
图20
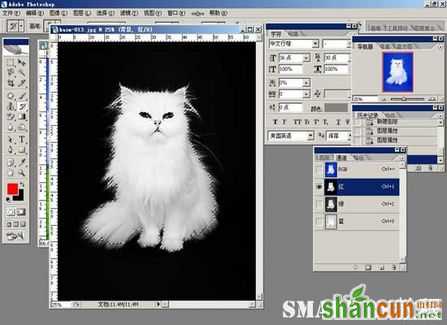
3、在通道面板,按住Ctrl单击红色通道,载入选区。
 nmousewheel="return bbimg(this)" onload="javascript:resizepic(this)" border="0"/>
图21
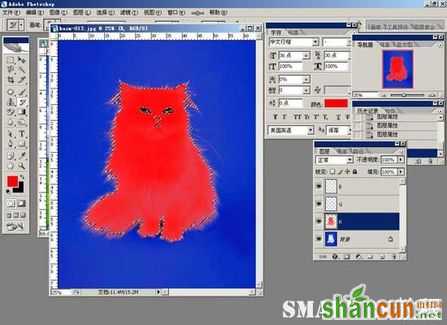
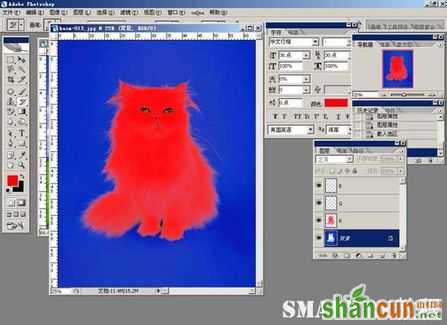
4、回到图层面板,在R层填充红色(R255)。
 nmousewheel="return bbimg(this)" onload="javascript:resizepic(this)" border="0"/>
图22
5、Ctrl+D,取消选区。
 nmousewheel="return bbimg(this)" onload="javascript:resizepic(this)" border="0"/>
图23
6、同样的,在通道面板,3lian素材,按住Ctrl单击绿色通道,载入选区。
 nmousewheel="return bbimg(this)" onload="javascript:resizepic(this)" border="0"/>
图24
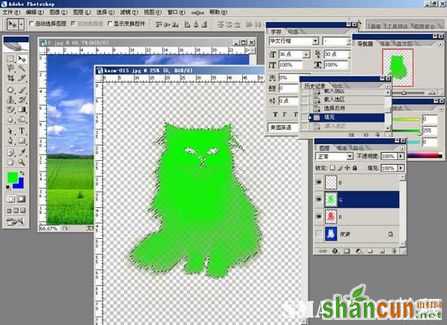
7、回到图层面板,在G层填充绿色(G255
 nmousewheel="return bbimg(this)" onload="javascript:resizepic(this)" border="0"/>
图25
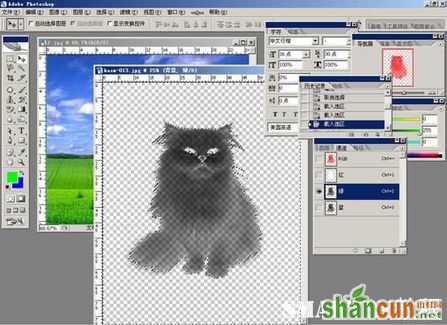
8、用同样的方法,在B层填充蓝色(B255)。
 nmousewheel="return bbimg(this)" onload="javascript:resizepic(this)" border="0"/>
图26
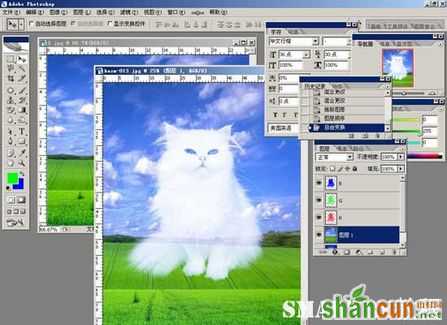
9、更改R、G、B的层模式为“滤色”。
nmousewheel="return bbimg(this)" onload="javascript:resizepic(this)" border="0"/>
图27
10、拖入背景图片,观看一下效果如何?
 nmousewheel="return bbimg(this)" onload="javascript:resizepic(this)" border="0"/>
图28
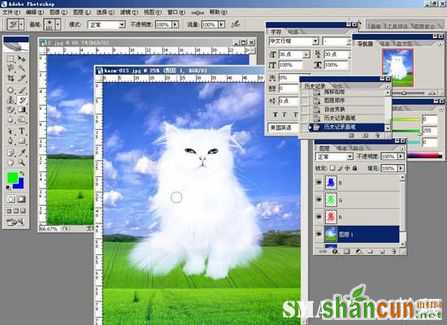
11、用历史记录画笔工具涂抹一下。
 nmousewheel="return bbimg(this)" onload="javascript:resizepic(this)" border="0"/>
图29
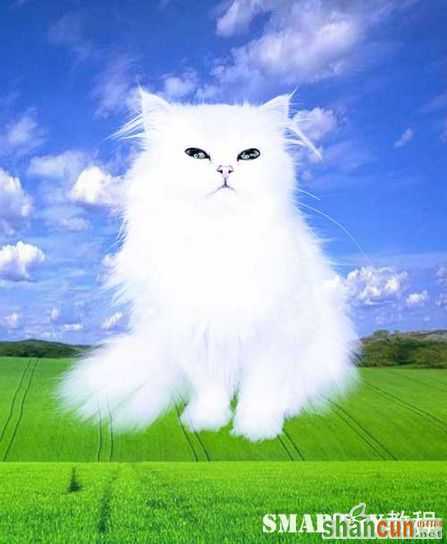
12、进行细微处的调整,得到最终效果图。
 nmousewheel="return bbimg(this)" onload="javascript:resizepic(this)" border="0"/>
图30


